Showing posts with label alterations. Show all posts

Wednesday, September 11, 2013

Sa'dia's Purple Alterations


Before alterations front

Before alterations back

The bra cups on this costume were super tiny and a bra extension just wasn't going to cut it. After much frowning, I was bolstered by this alteration by Ozma and I decided to mount the old bra directly on top of a new bra with new side straps. The belt also need some love but not so extensively. I took very few pictures of this alteration. I also forgot to take pictures of the finished product. But here is a quick overview of the process.
  • Cut off all bra fringe
  • Cut center connector of bra cups.
  • Cut off side straps.
  • Attached bra to new bra and made new side straps (in black.)
  • Salvaged sequins from old straps, shook them together with some (sort of ) matching purple sequins and filled in new straps, bra cups, and center connection.
  • Mimicked bra edge design and filled in with more (sort of ) matching beads and gold sequins.
  • Replaced bra fringe in new design.
  • Removed some fringe from back of belt and replaced with gold swags to mimic front of belt.
  • Trimmed everything with gold beads.


Monday, August 12, 2013

Shamadan Respec


So, I bought a shamadan.

This really wouldn't have been my first pick for a shamadan. It is incredibly heavy and the center post is crooked. It did have 2 very important things going for it. It was only $50 and it is the same shamadan used at my wedding. Double score.

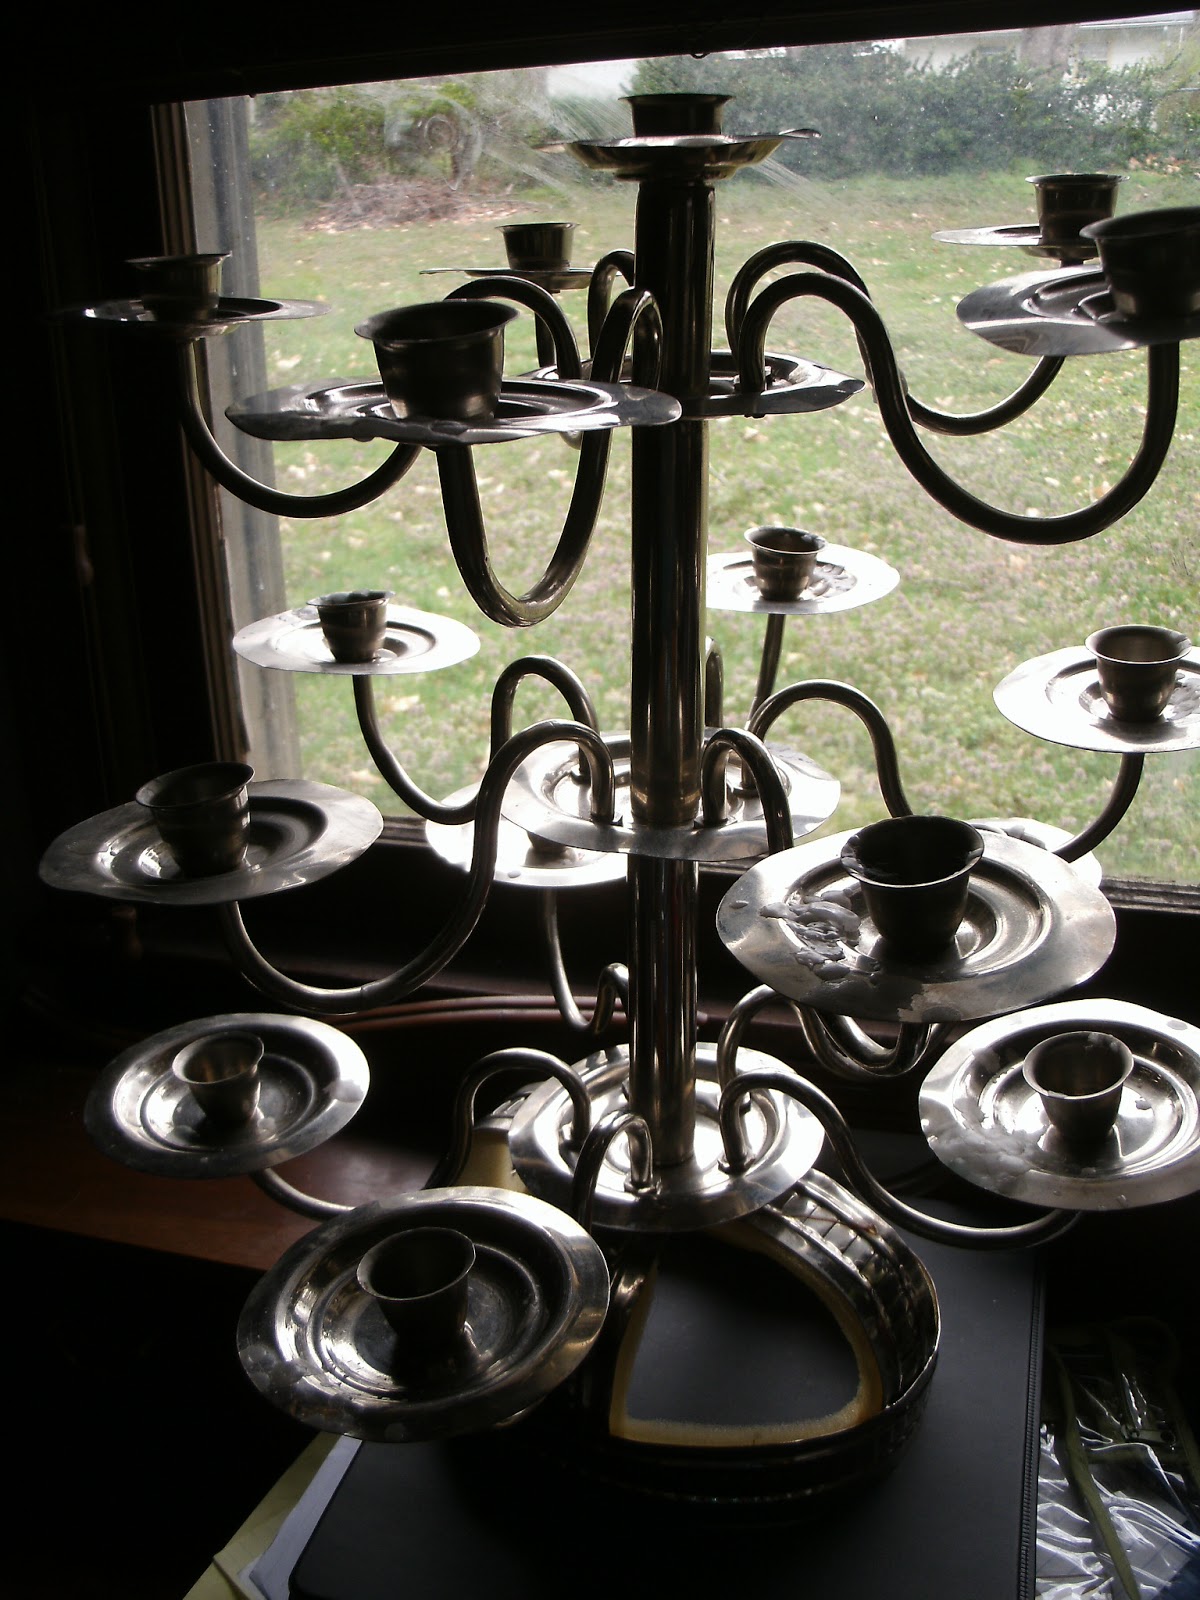
By the way, this shamadan is a beast! Sixteen candle holders total making it very top heavy. No matter how much I adjusted the padding or tightened the skull cap I could not keep it balanced. So I removed the entire top row of candle holders. Not because it made it lighter, (most of the weight comes from the rod in the center,) but to change the shamadan's center of gravity. It is easier to balance now with the shamadan's widest part closer to my head instead of 3 or so feet above it. Once I was able to walk around the room without incident I got to work on giving it a little bling.

 Blowing out the shamadan candles like a big bellydance cake after Amira's zeffa at my wedding. Props to Amira for rocking a 16 candle shamadan.


Metal rings and beads get salvaged from 2 different necklaces.

I attached beaded swags from the holes left by the removed arms.

Bead swag bottom view. This disguises the space gap left after removing the 5 top holders really well.

This piece of beaded fringe is attached using the metal rings from the other salvaged necklace.

Multiple layers of foam added and/or removed. I'm still working to get the right amount of padding in the right places.


My next challenge was the shamadan was stored in a green Christmas tree/decoration bag stuffed with pillows and foam for protection. I liked the bag idea but I wanted something more solid but still light enough to carry. Unfortunately, the shamadan is bigger than any solid container I can find to transport it in that isn't super heavy or super expensive. 

I decided to have a go at creating a case that will allow the shamadan to sit upright and stay protected using cardboard, duct tape, and my left over poly tubing from hoop making. If it works, Yay! If not I'm not out any money.


 I made a circle big enough for the shamadan to slip through. This will be the bottom support of the case. Boober, the needle eater, is on supervising duty.

I crafted a base from a cardboard box and some duct tape to fit the size of the hoop.

Three tube side supports added to the base with duct tape. You can see the green bag in this photo.

A matching hoop taped on top.

Doing a quick test to see if the shamadan will fit.

Getting a feel for how the cardboard sides will be attached.

Supervisor Boober patiently waits in his executive office for the finished product. Watching. Always watching.

More cardboard and duct tape. It's starting to come together!


With the new case inside of the bag it will not zip shut. I'm ok with that. The case keeps my shamadan safe and the bag provides carrying handles and additional space for transporting candles, lighter, and accessories. It won't win a beauty contest but it will get the job done. Best of all, it cost no additional money to make. I intend on adding more shiny bead swags to the shamadan when time allows.

Here is a link to a great shamadan info source by UK dancer, Candi.

~N


BONUS PIC: An interior view of the Supervisor's executive office.


Wednesday, July 10, 2013

Tutorial: Shortening Straps Without Cutting Them

I need to shorten these straps 4 inches but I don't want to cut into the strap if I can help it. Cutting means loose beads and frayed ends. It also makes it harder to lengthen them in the future. I am going to open up the bra cup lining, move the strap down, and replace the lining without cutting any part of the strap.

You will need:
Seam ripper
Scissors
Thread and needle
Measuring tape
Pins or safety pins

  • First mark the amount of length you want to shorten measuring from the cup up the strap. I measured 4 inches from the the cup and marked it with a safety pin, (top pic.) Then I seam ripped off a few rhinestones that I will use to replace broken ones on the belt.


  •  Then seam rip the lining stitches to expose the strap.


  • Next, seam rip the strap off of the cup.


  • Now slide the strap down to the mark you have made making sure to tuck the end of the strap smoothly under the lining. Also, make sure the strap has not twisted and is facing the correct direction. 
  • Pin in place. 
  • Stitch the strap back onto the cup, (not shown.)


  • To replace the lining, loosen a few stitches so you have a thread tail 2-3 inches long.


  • Tuck the tail under the lining. Make sure the remaining stitches are still tight and smooth after all of the tugging you have been doing on the lining.

  • Begin your first stitch 3-4 stitches back from the open edge of the lining and sew right over the top of the original stitches.


  • When you get to the last original stitch continue sewing to close the hole you have made.

  • Once you have sewn around to the other side of the hole, repeat the process of tucking under the tail and sew over 3-4 of the original stitches.
  • Knot and cut your thread.
  • Repeat all steps on the other side and you've shortened the straps without cutting them!

Good as new!


Find more info on altering bra straps at Shushanna's costume tutorials page. She has nifty diagrams and everything.

Have fun and good luck!

~N

Monday, May 06, 2013

Alterations for Naia in Red

 Original hem.

Here are a few pictures of the 4-5 inches I added to the bottom of Naia's new red costume. The pictures are a bit blurry and dingy, no thanks to my old yellowed cutting board that's been around since I was a kid. The new red hem actually matches much better than it looks. It makes the dark red sequins really pop.

 Tape added to protect beading when cut.

Snip

Beaded trim removed to be sew back on to new hemline.

Shiney red fabric added, bead trim reattached, additional beaded "leaves" added to extend the design.

New beadwork. Sequins and beads are different sizes from original but close enough to fool the eye.

Wednesday, February 13, 2013

Alterations for Maharet


There is no way to show how gorgeous the craftsmanship and bead quality is on this bra without actually holding it in your hands. Variegated fringe, stones the size of quarters, rhinestone chain trim everywhere. My photos don't do it justice. Normally I wouldn't gush so much over a simple strap alteration but this costume is just too pretty. I felt a little naughty when I started to cut into it.

Maharet needed to have the back straps extended about 5 inches. I scraped the necklace for matching beads and sequins. I had intended making and beading a new strap. After some study, I realized I could just use the already beaded edges of the necklace with minimal re-beading at the join between the new and old pieces.

~N

The whole picture. 

Heavily detailed bead work. 

A beaded applique design that is repeated throughout the rest of the skirt, headband, and armbands.

 Matching necklace used for parts.
The necklace was lined with the same stretch velvet from the skirt with wrong side of fabric facing out, velvet facing in.

Straps have been cut off the necklace, raw edges taped to prevent bead work from unraveling, silver bead work removed from center of strap.

"New" strap cut down the middle so it can be shortened to match the bra strap width.

New strap sandwiched together with some sturdy whip stitching (on underside,) to match bra strap at top of photo.

New extensions sewn onto ends of side straps. Bead work has been replaced on strap (top of photo,) with lining partially added. Strap at bottom is waiting its turn.

Hooks and lining added.

 The join between the original strap and the extension is practically seamless. I'm feeling a little smug about it.