Supplies:
- Base Fabric
- Interfacing, felt, denim, or equivalent
- Paper, pencil, tape
- Measuring tape
- All-purpose sewing thread and needle (or sewing machine)
- Scissors
- Pins
Hey, Hey! I am getting back into the swing of things Well, a little at least. I've actually had this part of the sew along done for a few weeks now but have not been able to put it all together. So far the belt is going much smoother and faster than the bra, working with a fairly flat surface and all. All the base construction can be done with a sewing machine. That speeds things up a lot.
My original plan was to make a V-shaped belt because (for me anyway) the shape seems to fit around curves easier, with less darting and altering than other shapes. But as you will see, it changed into a heart-shaped belt part way through the process.
The pattern I made based off of the
Sage Applique belt only with a much deeper V and higher, narrower sides. I just realized the pattern says 4.5" instead of the 5" that is clearly marked on the graph paper.
I took my hip measurement, divided it in half (for front and back), added 2 inches of overlap, and then drew a V to the depth I wanted. I recommend not going over 5-6" at the thickest part of the belt. I have noticed that plus sized dancers that have a wider hip measurement tend to also add inches to the height of the belt and throw the visual proportions off. Just because you may be fuller figured doesn't mean you are also taller, and vice versa.
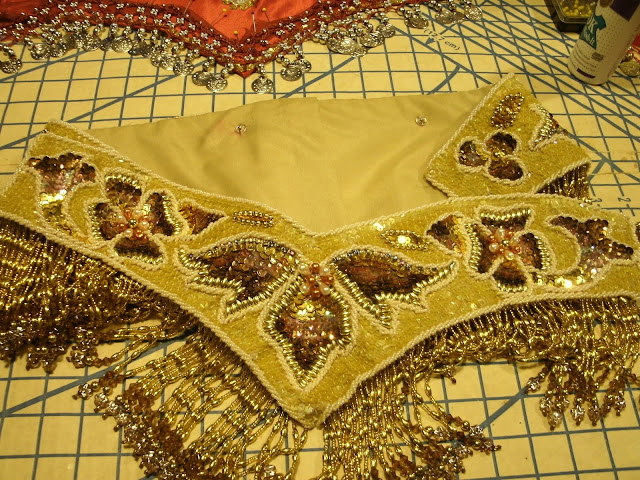
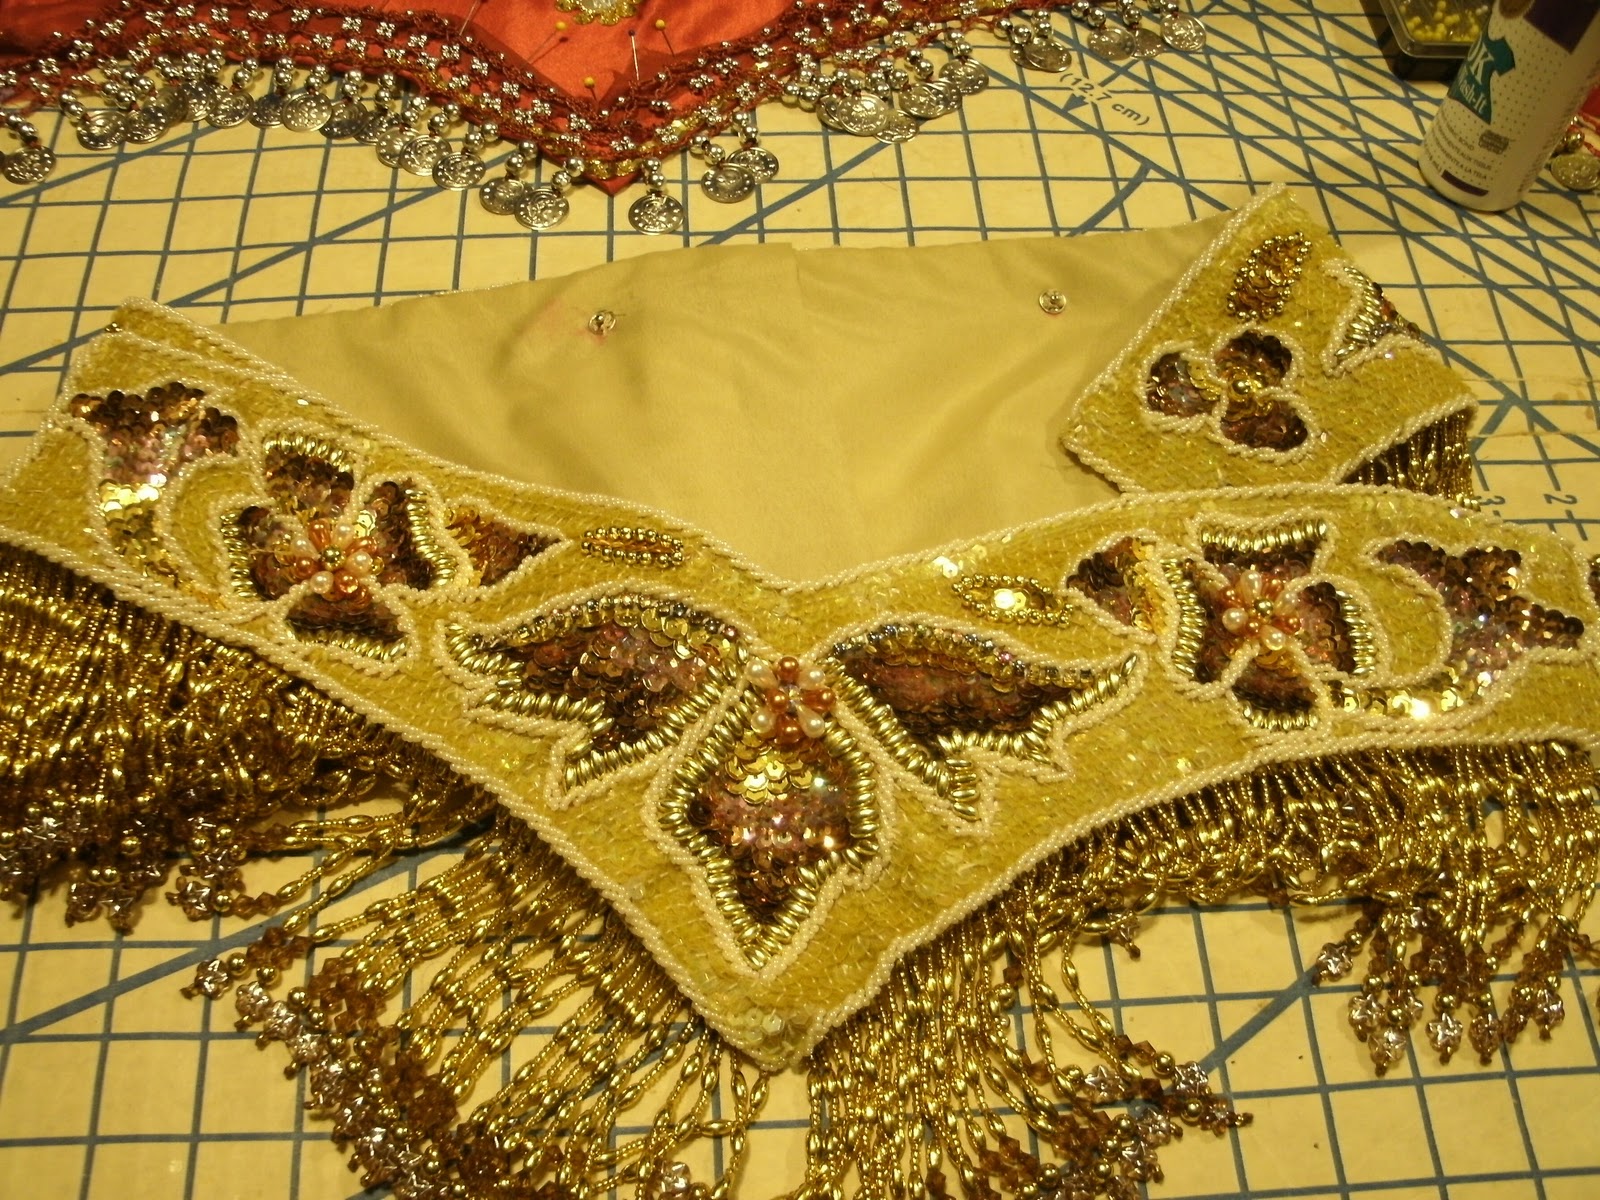
I've been altering another of Sa'dia's costumes and really liked the front of this belt. I also liked that the front and back of the belt are completely separate and finished pieces. It is sewn together on one side with hooks on the other side. The front piece overlaps the back piece like a giant belt buckle. I have read that this type of belt is easier to take apart and re-size than a belt that is a continuous piece but never really understood how it was sewn together. After studying it's construction, I decided to toss my belt pattern and make a belt similar to this.

This side of the belt is sewn together and looks just like the other side with hooks. It isn't as bulky as I thought it would be. To alter it, you only need rip out the stitches, move, and restitch. This way there is no need to add or remove sequins, cut length off, add length, or redo the lining when resizing.
The inside of the sewn edge.
I used the same hip measurement from the first pattern and traced Sa'dia's heart-shaped belt onto an old pair of khaki denim jeans for the front and back of my new belt. I added 2 inches to each side of the back piece for overlap. I intend on overlapping both sides (one stitched in place, the other with hooks) just like Sa'dia's belt. I then measured the base fabric with 1inch of overlap. I also wrote myself a note for posterity.
I had already covered the front of the belt with fabric when I realized it was only one layer of denim thick. Oops. I cut a 2nd layer and carefully stitched it on as close to the edge as possible, (it looks kinda pretty.) Then I covered 2 layers properly for the back of the belt making shallow cuts along the edge to allow the fabric to curve smoothly. No darts where needed. The belt base is now ready for decoration.
Next Task 9: Decorating!
Supplies:
- Remaining crocheted coin fringe from hip wraps used on bra
- Beading needle
- Sequins
- Rocaille beads
- Seed beads
- Acrylic sew-on jewels
- Upholstery thread/Beading thread
- Scissors
- Pins
- Fabric glue
Want to see ALL of the pictures from my bra build? Join the Flickr Sew Along group and add your own at
http://www.flickr.com/groups/bellydancesewalong/.
Good luck and have fun!
~N


 This side of the belt is sewn together and looks just like the other side with hooks. It isn't as bulky as I thought it would be. To alter it, you only need rip out the stitches, move, and restitch. This way there is no need to add or remove sequins, cut length off, add length, or redo the lining when resizing.


3 comments:
I wish this post had been around when I was first starting out in costuming!
I'd never really though about it before, but I definitely do have a tendency to make my belts taller to 'compensate' for the fact I am a lady of generous proportions, and then end up wondering why they don't look right.
I've learnt something today!
I had the problem of making belts way too tall thinking I need more coverage because of my curves or that I wanted to cover my tummy pooch. When in reality, the taller the belt, the more I looked like dough squished out of a busted pastry tube. A normal belt height is generally less restricting especially if you are curvy. It took a lot of time "playing dress up" with different belts and borrowing things to figure out what works and what doesn't.
Great post thannks
Post a Comment