

I have received some comments and questions from beginner costumers out there (RetroKali ;) and figured it would be helpful to make a separate post on beading supplies and such to keep you from learning the hard way, (like I did.) I should have done this post first. I am self taught. I probably learned everything in reverse. Oh well, 20/20 hindsight and all that.
This is basic stuff. If you have tips of your own to share leave them in the comments for other readers.

I use upholstery thread or nylon quilting thread for beading. It is cheaper than "beading thread" and strong enough to keep beads from ripping out too easily. You can find it in multiple colors but a spool of black and white are sufficient. Unless you are using a really unique bead/costume color no one will see the thread once you bead it. Regular cotton/polyester thread is too weak for costuming. Even with two strands thick it will break.
I have spent a good deal of time studying bead work on professional made costumes imported from the Middle East. They are often beaded with a thicker cottony cord-like thread, particularly on fringe. It seems more durable and is harder to break but it also seems to deteriorate faster over time than nylon based thread. I have even seen costumes beaded with fishing line and I have heard of people using dental floss as thread. I have not tried fishing line or floss myself but feel free to experiment and share your tips.
Make sure to tie off your thread frequently. This is a preventative measure in the instance the bead work gets damaged while dancing. You know how aggravating it is when your favorite coin hip wrap snags and all of the bead work starts to unravel. You can prevent all your hard work from unraveling by tying off the thread every 8-10inches of work. Just make a few stitches on top of each other on the back side of the fabric and continue working. You do not have to cut the thread off and start again. This works great on skirt hems that get stepped on. You will loose fewer beads/sequins to damage and only a portion of the bead work will have to be replaced. Not to mention if you botch a design you only have to rip out the little bit you messed up on instead of a really big chunk.
NEEDLES

Six Beading needles in comparison to a regular sewing needle on the right. Notice the difference in thickness.
Beading needles are a must for beading. They are very thin, almost flimsy, allowing them to pass through the holes of very small delicate beads. They are usually longer than regular sewing needles giving you more room to grip while loading bead/sequins on them. Despite their flimsiness they can pass through multiple layers of fabric easily with slow steady pressure. However, you may struggle with very tightly woven fabric or fabric that is stiffened with glue. They will also bend, break, and loose sharpness over time. I once ripped the eye of a very very thin needle out just by giving the thread a good yank. I didn't even think that was possible.
BEADS

There are really no rules as to the kind of beads you should use for Bellydance costuming. I have seen everything from plastic to glass to metal. Important things to consider when buying beads is your design, the longevity/amount of wear the costume will receive, and your budget. I always keep gold and silver rocaille beads on hand. Gold and silver go with everything. And when in a pinch, or if you need to repair a costume in an unusual color, silver will fill in gaps and reflect the other colors around it.
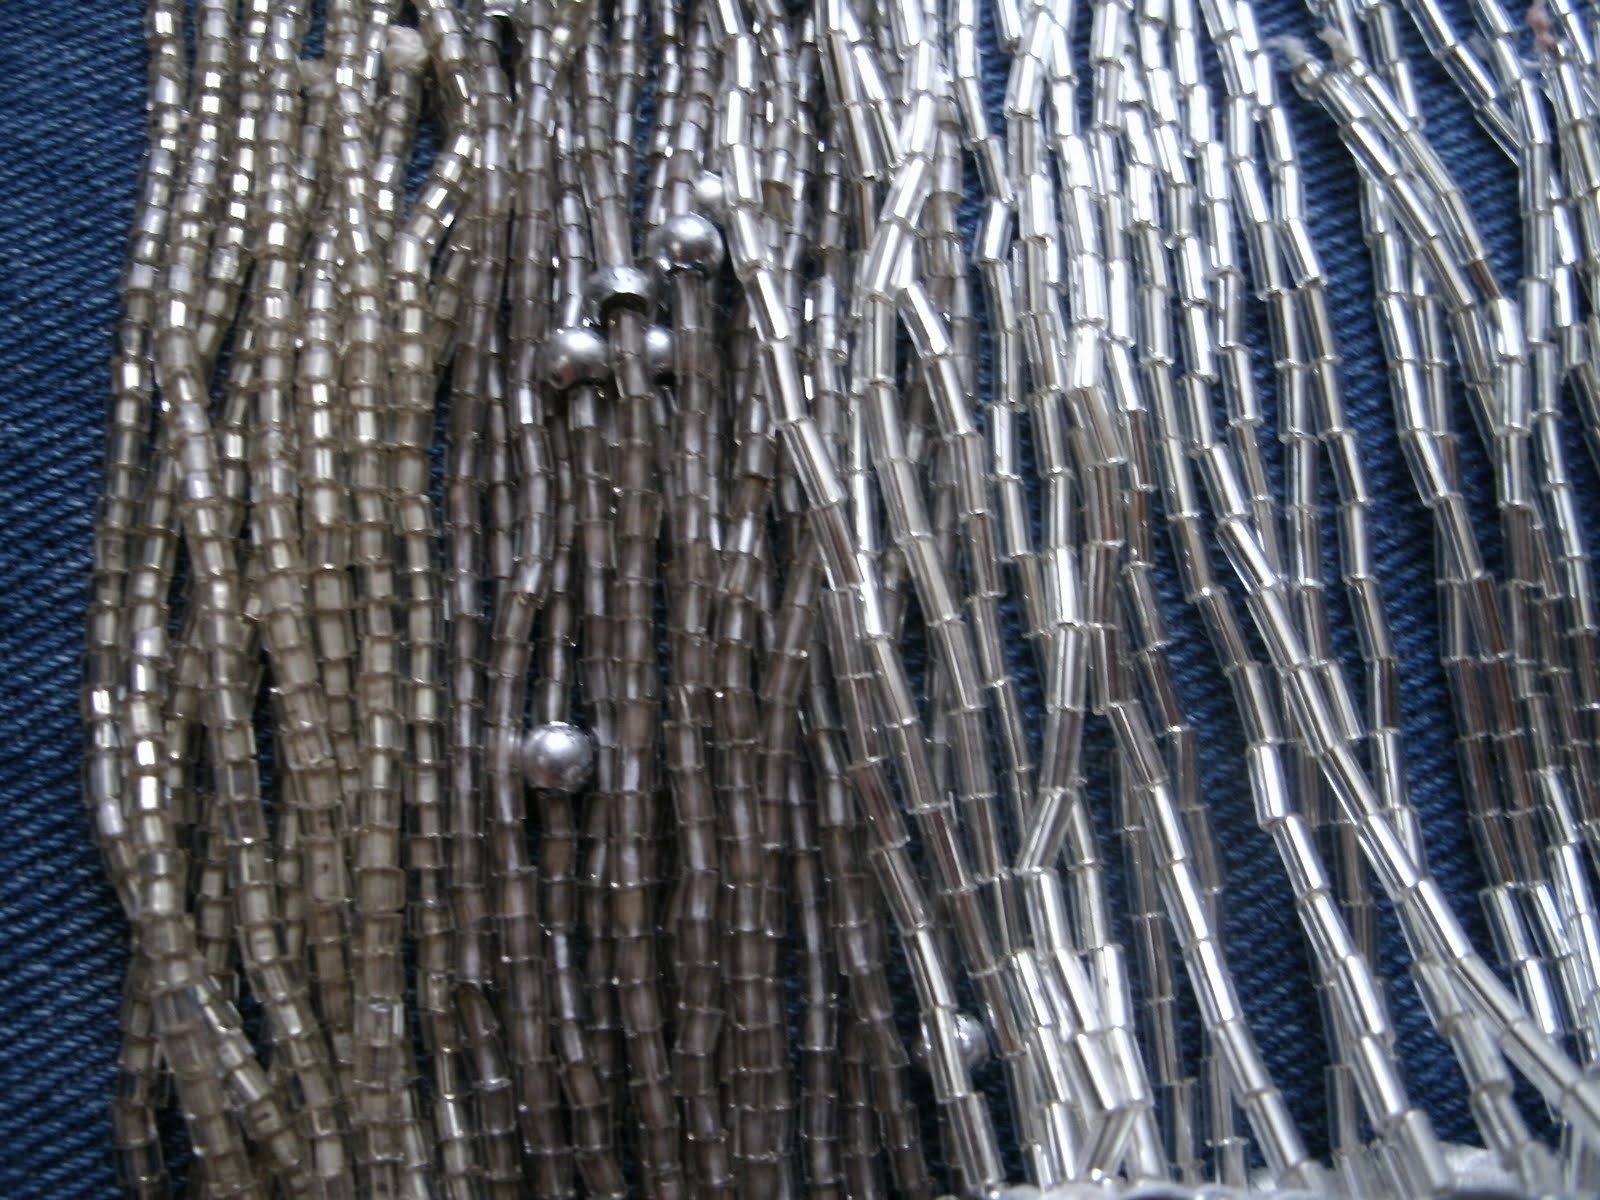
Three kinds of silver fringe, the first two without foil lining, the third with foil lining. The foil lined fringe is much shinier.
Keep an eye out for "foil-lined" beads. Foil-lined beads are coated inside the hole of each bead making them shinier and are more aesthetically pleasing. They may be a little more expensive but definitely worth it.

Plastic beads with the silver paint worn off.
Be warned that painted metallic beads, or any bead with the color painted on will wear much faster than a glass bead or a bead with the color infused into the material it is made from. There is a way to treat beads with a clear coat so the color will not wear as fast but I have never tried it. I have also heard of dancers coating beads, sequins, and coins with clear nail polish to protect from wear. This works in a pinch but is not practical for entire costumes.
SEQUINS

8mm (left) and 4mm sequins
I prefer to use metallic faceted sequins over flat sequins because they reflect the most light. I also use 8mm size sequins the most because one sequin covers more area than 6mm or 4mm. Anything bigger than 8mm starts to look a little cartoony.

8mm Sequins loosing their holographic stickers, also notice the beads are not foil-lined because you can see straight through to the thread.
Beware of sequins with patterned stickers on them. They look fantastic but repeated rubbing and sweat will cause the stickers to peel leaving dirty plastic disks behind. The only way to replace them is to rip them all out and start over.

I use a small Girl Scout Cookie tin to hold my beading supplies when I travel and the lid as my bead tray while I work.
I do not spend money on fancy bead trays or dividers. I use old mismatched plastic or cookie tin lids that I would normally throw away. The lip of the lid keeps your beads from rolling away. Old pill bottles and film canisters work great for holding safety pins, beads, needles, etc.
Tip: Do not dump all of your beads/sequins into the tray at once. Pour out only about a tea spoon at a time. No matter how careful you are you WILL at some point accidentally dump your tray. Picking up a small amount of beads out of carpet is much better than a whole bag. This is also handy for quick clean up when you are done working.

I always wondered what good "snack size" plastic storage bags were for. Turns out they are perfect for all things Bellydance. Aside from jewelry, I keep beads and sequins in them because they seal tight, travel well in small spaces, and it is easy to identify what is inside. I add the label from the original packaging so I can match the color and size of the bead/sequin when it is time to buy more.

Styrofoam cooler lids filled up like junk drawers with costuming supplies.
I discovered that instead of throwing them out, styrofoam cooler lids make great beading trays for when I work sitting on the couch or in bed. I flip them upside down and use them like TV trays. The lip keeps bead from rolling away and you can stick your needles into the foam like a pin cushion. I added a clip on LED book light for when I need extra light in darker rooms of the house.
BEADING AIDS/MISCELLANEOUS

Here is a list of some optional items that may help you while beading:
- Tape measure - helps keep your designs evenly spaced and semetrical. Also helps you mark placement of straps and hooks.
- Tailor's chalk or marker - use this to mark key points on your fabric to keep the design even or trace you design directly on to the fabric. Tailor's chalk and markers are water soluble allowing them to be removed. Test them in a discrete area first to make sure you can remove the marks.
- Seam Ripper - I promise you will definitely have to rip something out and redo it at some point. If you don't then you must be a freak of nature. A seam ripper is a must where scissors just don't cut it, (no pun intended.)
- Thimble - Use a thimble to protect your fingers when pushing through heavy fabrics.
- Needle Threaders - I can take them or leave them. I have just as much trouble pushing the threader through the eye of a needle as I do thread. Luckily upholstery thread is stiff enough that it slides through the needle fairly easily.
- Bead grabbers - Those funny little things that fit like thimbles with a small patch of velcro to help "grab" beads from the tray. It will grab beads but I find using it awkward and an unnecessary middleman when I can poke the beads directly out of the tray with the needle. I wish I had my $2 back.
- Bead Spinner/Threaders - These are completely awesome and totally worth it if you intend on making your own fringe. Making fringe by hand is quite tedious. With a bead spinner you can thread the beads faster than you can tie the thread off. When and if I get better at making fringe I'll post about it. Until then check out my spinner here.
COSTUME CONSTRUCTION COMMENTS
As for basic costume construction, there are a lot of resources already out on the internet if you look for them. How to cover a bra, how to fit a belt, skirt patterns, etc. I am not going to cover costume construction unless I come up with something extra special to share. I do highly recommend Dina the Costume Goddess' books for Bellydance costume construction and design. I own the Bra and Belt book and still reference it every time I begin a new costume. Dina's books are very thorough and concise. To get an idea of how well they are put together check out the table of contents for Tribal Vibes for Bellydancers.
Have fun and Good luck!
~N
2 comments:
fantastic post,thank you so much. :)
great tutorial! Thanks! ;)
Post a Comment