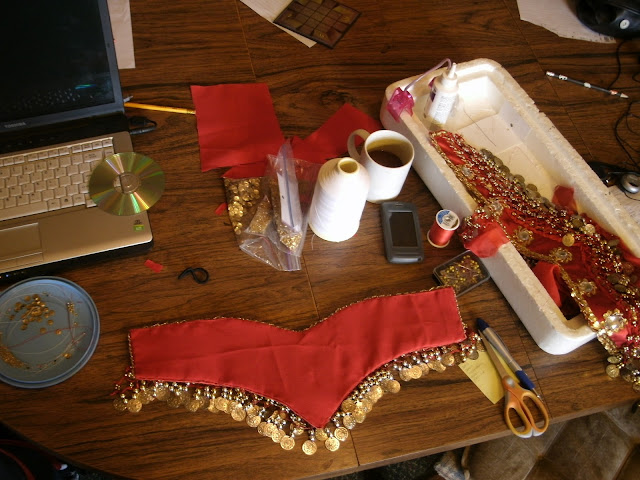
It only took me 7 months to get here but look what I have to show for it!
Supplies:
- All-purpose sewing thread
- All-purpose sewing needle
- Sew on bar and hooks
- Sew on snaps (optional)
- Scissors
- Pins and safety pins (optional, for fitting)
- Tape Measure (optional, for fitting)
Not a lot to report in this last post. We just have to add the lining and hooks. It's pretty straight forward and very much like finishing the bra. If you have any burning unanswered questions please make a comment or contact me via the info in the About tab.
The back of the belt before the lining goes on.
Lining edge folded under with a blanket stitch holding it in place.
More of the same
A neat and tidy bottom edge.
Reality...my dining room table covered with all manner of sewing supplies.
Whip stitches are probably a hair quicker to sew but I prefer the smooth straight blanket stitches.
Our super sexy green 60's couch modeling the completed belt.
Now some gratuitous close-ups...
At this point, I pinned the belt together and marked how much overlap there would be and where the hooks would be located.
Snap and hook hidden in the bead work.
Inside view where I have sewn one side of the belt closed. I have about 2 inches of leeway for size adjustments. Since I saved this step for last, I can easily rip out the stitches, adjust, and resew without cutting into any bead work or fabric.
The sewn together edge from the front. There is barely any bulk from the overlap at all.
I stitched around all of the overlap edges accept this small section. If I ever have to re-size the belt I do not want big needle marks in the exposed satin. I only stitched in places where it is hidden by bead work or fringe.
A hook at the top. A hook at the bottom. A snap to keep the flap from sliding around while dancing.
I don't like trying to aim the needle through those little holes. My stitches don't look too bad for once.
The corresponding bars and snap on the other side of the belt. Can you see the snap hidden between my fingers under the two middle rows of gold bead work?
Funny story here. I sewed one of the snaps on backwards. This created two "male" ends instead of a male and female. I tried on the costume and felt a "snap" when it was pushed together. Everything fit fine. The next performance rolls around and I'm backstage getting ready and discover the snaps don't actually work. Luckily the two hooks where enough to hold everything together.
Coin fringe detail. Look at all of those little Romans. Eventually, the metallic coating will rub off of the beads but I think the mix of silver and gold will make it appear antique as apposed to just plain cheap.
BAM! Rocking the finished bedlah in my bathroom, paired with a red velvet mermaid skirt and cuffs. It actually turned out pretty close to my original design.
Alternatively, the bedlah paired with coin wrap skirt and black pants underneath. pic:C. Wells
Ta Da! (What is going on with my arms?) The sleeves are a pair of tights with the feet and crotch cut out to make a shrug. pic:C. Wells
It's hard to believe I started with a few coin wraps, some old clothes scraps, and a few bucks worth of sequins and beads. Check out the Flickr slideshow above and see how far we've come. Join the Flickr Sew Along group and add your own pictures at http://www.flickr.com/groups/bellydancesewalong/.
As always, have fun and good luck!
~N
P.S. I've spent too much time looking at red fabric over the past year. I now have 3 red costumes and a 25+ yard skirt in the works that's just about finished. When it is done I am officially done with the color red.


4 comments:
Gorgeous!!! Reminds me I should get off my bum and finish off the bra of mine soon.... maybe after I finish adjusting the new bra and belt I bought...
Looks great! The colors really pop when you are in better lighting!
Ok! I really did sew along, I'm just slow with reporting the results. Uploaded a pic to the flickr group just now.
My bra still needs work on the shoulder straps and side pieces to make it look cohesive, but overall, I like it. Now I just need to do a belt. :-)
Thank you for creating this project.
nice work
Post a Comment